PERSPECTIVES/ THE CONSULTING GROUP, LLC
  • Home
    • Who We Serve
    • How We Work
    • Services >
      • Concept Development
      • Strategic Planning
      • Brand Development
      • Operations
      • HACCP / Food Safety
      • Menu / Product Development
      • Marketing / Research
      • Design
      • Market Planning / Site Analysis
  • Why Perspectives?
    • About Us
    • Principals
    • Mission Statement
    • Code of Ethics
  • Clients
    • Testimonials
    • Client List
  • Contact Us
    • Phone, Address & Contact
  • Covid-19 Survival Guide
  • Perspectives On Food

Cooking Lesson #985: The Ginger-Lemon Elixir

1/24/2025

0 Comments


…from the Perspectives’ Happy Hour Bar

Ginger Lemon Elixir Cocktail
How you doin’? If you’re not doing all that well today, try shaking up this soothing cocktail with ginger simple syrup, lemon and vodka to improve your condition.
 
Whenever I feel like I’m coming down with something or I’ve had a bit too much of something, I turn to my magic elixir of lemon, ginger and, of course, vodka, which I swear cures whatever ails me. Those flavors work for so much more than sick days though. I like combining them with vodka to transform it into a soothing cocktail that has become my ideal cold weather companion.
 
My Ginger-Lemon Elixir starts with homemade ginger simple syrup, made by infusing sugar and water with pieces of ginger until perfumed throughout. The clean flavor of vodka lets the spiciness of the ginger simple syrup and the tartness of the lemon shine through. And a dash of Angostura Bitters adds depth to round it out. It’s truly great anytime. Whether you’re enjoying one on a cozy winter night or during a late afternoon summer tailgate, this cocktail never disappoints.
 
Prep time:  5 minutes
Cook time:  5 minutes
Yield:  1 cocktail
 
Ingredients 
For the ginger simple syrup (makes 2/3 cup ginger simple syrup)

1 (2-inch) piece ginger (at least 1-inch wide)
1/2 cup granulated sugar
1/2 cup bottle or filtered water
 
For the elixir cocktail
1 long strip lemon peel, for garnish
2 ounces vodka
3/4 ounce ginger simple syrup (recipe above)
3/4 ounce freshly squeezed lemon juice
2 dashes Angostura bitters
 
Directions
To make the ginger simple syrup
  1. Cut 1 (2-inch) piece of ginger lengthwise into 3 slices (no need to peel); place in a small saucepan.
  2. Add 1/2 cup granulated sugar and 1/2 cup water.
  3. Bring to a boil over medium-high heat, whisking until the sugar dissolves.
  4. Transfer to a heatproof container and let it cool.
  5. Cover and refrigerate until it’s cold, preferably overnight.
  6. Remove and discard the ginger before using.

To make the elixir
  1. Place a coupe glass in the freezer for at least 5 minutes to chill.
  2. Pour the vodka, ginger simple syrup, lemon juice and Angostura bitters in a cocktail shaker.
  3. Add enough ice to fill the shaker about half full. Seal the shaker and shake vigorously until the outside of the shaker is frosty, about 30 seconds.
  4. Pour through a strainer into the chilled glass.
  5. Twist the lemon peel directly over the cocktail’s surface to release the lemon oil, then garnish with the peel.

ChefSecret:  The ginger simple syrup can be made up to 1 month ahead and refrigerated in an airtight container.

Quip of the Day:  A man walks into a bar and orders a drink. A minute later he hears, “You look amazing. Have you lost weight?” He looks around, but there’s no one nearby. Again, a minute later, he hears, “You know, you don’t look a day over 30.” Looks around again, no one but him and the bartender, so he asks, “Did you hear that?” The bartender says, “It’s the peanuts. They’re complimentary.”
----------------
---------------------------
Do you have a question or comment?  Send your thoughts to [email protected]. All recipes and cooking tips are posted on our website https://www.perspectives-la.com/covid-19-survival-guide.
-------------------------------------------
To you and everyone dear to you, be strong, positive, stay well, stay safe and be kind. Take a breath and count your blessings, and if you have a little extra to share with others, please consider donating to  Feeding America, Tunnel to Towers, Union Rescue Mission and/or American Red Cross.

​#Cocktail #GingerLemonElixir #GingerSimpleSyrup #Ginger #Lemon #Vodka #HappyHour2025  #Cheers #Recipes2025 #URM #T2T #FeedingAmerica #RedCross #SamaritansPurse #PerspectivesTheConsultingGroup 
 
                                                                           ©PERSPECTIVES/The Consulting Group, LLC, 2025

0 Comments

Cooking Lesson #984: Mama Mia’s Original Sicilian Soup

1/22/2025

0 Comments


…from the Perspectives’ Kitchen
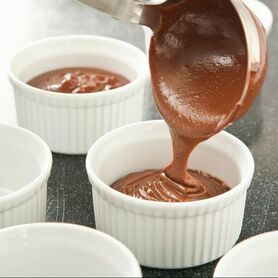
Bowl of Sicilian Soup
How you doin’? It’s really chilly everywhere this week, and while it may be hard to imagine for some, there is a winter season in Las Vegas… always a good time for a great hearty soup.
 
I love my Mama Mia’s Original Sicilian Soup. It’s a classic Italian dish made with hearty ingredients like sausage, white beans and root vegetables all simmered together in a flavorful broth.
 
Prepare your tastebuds when you spoon up shlurps of this soup with bright and comforting flavors. This is a complex dish with layers of creamy and tender beans and spicy Italian sausage slices to the rich broth filled with hearty winter vegetables.
 
Prep time:  30 minutes
Cook time:  1 hour 50 minutes+
Yield:  4 to 6 servings

​Ingredients 
2 tablespoons extra-virgin olive oil, plus more for drizzling
1 finely chopped leek (white and tender green parts only)
2 carrots, 1 finely chopped, 1 sliced
1/2 finely chopped fennel bulb
1/2 teaspoon kosher salt, plus more to taste
1/2 teaspoon red pepper flakes
3/4 cup dried white navy beans
1/2 cup farro
1 15-ounce can diced tomatoes
2 quarts low-sodium chicken stock
2 to 3 sprigs fresh thyme
1 2-inch piece parmesan cheese rind
4 cups water
13 ounces Italian sausage cut into 1/2 inch rounds
4 large, chopped cabbage leaves large center ribs removed (about 2 cups)
1 cup grated parmesan cheese
1/4 cup fresh lemon juice, for serving
 
Directions
  1. Heat the olive oil in a large soup pot over medium heat.
  2. Add the leek, chopped carrot and fennel, and season with salt and the pepper flakes.
  3. Sauté slowly until the vegetables are very soft but not browned, about 3 to 4 minutes.
  4. Add the white beans and farro; toast these ingredients in the pan for 2 minutes.
  5. Add the tomatoes with their juices and the chicken stock, thyme, parmesan rind and 4 cups water. Bring it all to a boil, then reduce the heat to a steady simmer.
  6. Cook, stirring occasionally, about 1-1/2 hours or until the beans are tender but not mushy; they should be firm and separate.
  7. Season with additional salt to taste.
  8. Add the Italian sausage, cabbage and sliced carrot.
  9. Cook until the cabbage and carrot are tender, about 15 minutes.
  10. Remove and discard the thyme sprigs and parmesan rind.
  11. Serve with a drizzle of olive oil, a sprinkle of grated parmesan and a squeeze of lemon for freshness.

ChefSecret:  The Parmesan rind adds a nutty, fuller flavor to the soup. What else were you going to do with it?

Quip of the Day:  My mother used to feed me alphabet soup when I was a kid. She insisted on me telling everyone that I loved it. I really didn't, she was just putting words in my mouth!
-------------------------------------------
Do you have a question or comment?  Send your thoughts to [email protected]. All recipes and cooking tips are posted on our website https://www.perspectives-la.com/covid-19-survival-guide.
-------------------------------------------
To you and everyone dear to you, be strong, positive, stay well, stay safe and be kind. Take a breath and count your blessings, and if you have a little extra to share with others, please consider donating to  Feeding America, Tunnel to Towers, Union Rescue Mission and/or American Red Cross.

#Soups #OriginalSicilianSoup #ItalianSausage #Farro #Fennel #ParmesanCheese #2025Recipes #QuarantineKitchen #URM #T2T #FeedingAmerica #RedCross #SamaritansPurse #PerspectivesTheConsultingGroup   
                                                                           ©PERSPECTIVES/The Consulting Group, LLC, 2025

0 Comments

Cooking Lesson #983: Forgotten Instant Pot Mashed Potatoes

1/20/2025

0 Comments


…from the Perspectives’ Kitchen

Picture
How you doin’? Sometimes when I’m preparing dinner for many people, every one of my burners is occupied and both my ovens are stuffed. I’ve run out of room! What’s an overly ambitious chef to do?  Get out the Instant Pot and plug it in. With my handy-dandy Instant Pot I can both cook and hold while everything else is occupied. A large bowl of classic mashed potatoes makes any meal a little better.
 
I hate to admit it, but my mother came from a long line of mashed potato and cranberry forgetters when preparing a large meal. A familiar cry heard each Thanksgiving was, “Where are the mashed potatoes!” This could mean one of three things:
  • Someone forgot to start them
  • Someone forgot they were cooking
  • Or someone forgot them in the kitchen, and they were stone cold by the time they hit the table.
 
This always bummed me and everyone else out. I mean, we’re talking mashed potatoes here! What could be more important to a holiday or even a family dinner?
 
So, I set out to change my family’s mashed potato legacy. Thankfully, it was pretty easy. My secret to great mashed potatoes—the Instant Pot. Instant Pot mashed is seriously good. And thanks to the “keep warm” setting, you never have to worry about serving cold mashers. Now, if only you can get the gravy right!
 
Prep time:  30 minutes
Cook time:  30 minutes
Yield:  8 servings
 
Ingredients 
1-1/2 cups water
4 pounds russet potatoes, peeled
2 cups half-and-half or whole milk, warmed
8 tablespoons (1 stick) unsalted butter, at room temperature
2 teaspoons kosher salt
Freshly ground black pepper (optional)
 
To keep warm
1 tablespoon unsalted butter, at room temperature
3 tablespoons half-and-half or whole milk
 
Serving options
1 tablespoon chopped fresh chives
2 tablespoons cold unsalted butter
 
Directions
  1. Set a wire rack in a 6-quart or larger Instant Pot.
  2. Add the 1-1/2 cups water.
  3. Place the potatoes on the rack. Lock the lid and make sure the valve is sealed.
  4.  Set the cook time for 20 MINUTES at HIGH PRESSURE.
  5. When the cooking time ends, do not vent the pressure cooker. Allow the pressure to release naturally; this can take up to 15 minutes.
  6. Once the pressure valve drops, carefully open the lid and transfer the potatoes to a large bowl.
  7. Add the half-and-half or milk and butter.
  8. Mash with a potato masher, food mill, or ricer. (Or whip the potatoes with a stand or handheld mixer on low speed with the paddle attachment. Do not use an immersion blender or food processor.)
  9. Add the salt, season with pepper, if desired, and stir to combine. Taste and add more salt and pepper as needed.
  10. To keep the mashed potatoes warm, wash the insert of the pressure cooker to remove any cooking starch. Return the insert to the pressure cooker and coat the bottom and sides of the insert with butter.
  11. Add the half-and-half or milk. Spoon in the warm mashed potatoes but don't stir. Cover with a glass lid or pressure cooker lid. If using the pressure cooker lid, be sure to turn the sealing valve to open.
  12. Turn on the "KEEP WARM" setting. Gently stir the potatoes every 20 to 30 minutes to prevent them from sticking to the pot.
  13. When ready to serve, spoon the mashed potatoes into a serving dish and top with chopped chives and a few pats of butter.

ChefSecret:  Mom used to forget the gravy, too. I have a second 6-quart Instant Pot just for the giblet gravy. The only thing I have to be concerned about is tripping a breaker!
Storage: Leftover mashed potatoes can be stored in an airtight container in the refrigerator for up to 4 days.

Quip of the Day:  Q. What did the angry potato say during an argument?  A. You better be careful or I’ll mash you!
-------------------------------------------
Do you have a question or comment?  Do you want to share a favorite recipe or pictures with our readers?  Send your thoughts to [email protected].  All recipes and cooking tips are posted on our website https://www.perspectives-la.com/covid-19-survival-guide. Looking for something specific? Check out the search feature to make it easier to navigate through our blogs. 
-------------------------------------------
To you and everyone dear to you, be strong, positive, stay well, stay safe and be kind. Take a breath and count your blessings, and if you have a little extra to share with others, please consider donating to  Feeding America, Tunnel to Towers, Union Rescue Mission and/or American Red Cross.

#SideDishes #MashedPotatoes #InstantPot #InstantPotMashedPotatoes #2025Recipes #QuarantineKitchen #URM #T2T #FeedingAmerica #RedCross #SamaritansPurse #PerspectivesTheConsultingGroup
 
                                                                         ©PERSPECTIVES/The Consulting Group, LLC, 2025

0 Comments

Cooking Lesson #982: Margarita Mocktail for Dry January

1/17/2025

0 Comments


…from the Perspectives’ Happy Hour Bar

Margarita Mocktail
How you doin’? I have a fairly addictive personality and being in the restaurant business that’s not a good thing when you are surrounded by alcohol 18 hours a day. But the stronger part of my personality is that I can control my urges and cravings.
 
About 6-months after we opened The Warehouse Restaurant, I concluded that this was not going to be a passing fancy but that the restaurant business was going to be the main part of my life—my career going forward. That was the last time I had a drink in any of my restaurants. I didn’t  stop drinking—just never in my house. Personally, I felt better not drinking. And though my body and mind like the alcohol-free lifestyle and benefits, there are certain things I miss—like my Margaritas!
 
Since having a cocktail is a social thing I needed to come up with a fabulous, non-alcoholic “mockarita” to satisfy my needs. This Margarita Mocktail is a flavorful, slightly spicy, super refreshing, social  beverage for everyone and at any time... especially Dry January!!
 
So, if you’re taking out the tequila, the question becomes what are you adding, right? Well, my recipe uses different kinds of citrus and sparkling water to create its’ refreshing flavor. My Margarita Mocktail recipe calls for orange juice, grapefruit sparkling water, and lime juice. All easy things to have on hand for when you want a Margaritaville kind of experience!
 
I also like to add a measure of jalapeño simple syrup. It plays a pivotal role in this mocktail. It does double duty adding both sweetness (from the light-colored, raw honey), as well as spiciness (from the jalapeño ). I think you’ll find it to be well-balanced, but if you like yours less or spicier, you can adjust the amount of jalapeño pepper in your syrup to suit your taste buds. And to finish it off, I like to add some Tajin seasoning to put a spicy rim on the glass instead of salt.
 
Prep time:  2 minutes
Yield:  1 mocktail
 
Ingredients 
1 ounce freshly squeezed lime juice
2 ounces jalapeño-honey simple syrup (see the ChefSecret below)
2 ounces freshly squeezed orange juice
4 ounces grapefruit flavored sparkling water
Garnish with a lime wedges and jalapeño slices
Tajin seasoning to rim the glass
 
Directions
  1. In a cocktail shaker or a tall glass, combine the lime juice, jalapeño simple syrup, orange juice and grapefruit sparkling water.
  2. Fill the shaker or glass with ice cubes.
  3. Shake the mixture well until it’s thoroughly combined and chilled.
  4. Prepare your serving glass by rubbing the rim with a lime wedge and dipping it in the Tajin seasoning.
  5. Strain the margarita mixture into your prepared glass, ensuring that the ice cubes are left behind.
  6. Garnish the glass with a lime wedge and a slice of jalapeño.
  7. Serve your non-alcoholic jalapeño margarita immediately and enjoy it’s refreshing and spicy flavors!
Note:  Feel free to adjust the quantities of ingredients to suit your taste preferences. Cheers!
 
ChefSecret:                         Spicy Jalapeño-Honey Simple Syrup 
Prep Time:  2 minutes
Cook Time: 3 minutes
Yield:  Makes enough simple syrup for 6 to 10 Margarita Mocktails
 
Ingredients 
6 ounces raw, light-colored honey
6 ounces water
2 tablespoons diced jalapeño peppers
 
Directions
  1. Place the honey, water and jalapeño peppers in a saucepan set over low heat.
  2. Stir frequently to warm for 2 to 3 minutes, until the honey is fully incorporated.
  3. Remove from the heat and set aside to cool.
  4. Let the mixture cool to room temperature.
  5. Then strain the liquid to remove the minced jalapeños pouring the mixture into an airtight glass container.
  6. Store the jalapeño-honey simple syrup in the refrigerator for up to 10 days.

​Quip of the Day:  Mocktails: the perfect blend of laughter and carbonation!
------------------------------------------
Do you have a question or comment? Send your thoughts to [email protected]. All recipes and cooking tips are posted on our website https://www.perspectives-la.com/covid-19-survival-guide.
-------------------------------------------
To you and everyone dear to you, be strong, positive, stay well, stay safe and be kind. Take a breath and count your blessings, and if you have a little extra to share with others, please consider donating to  Feeding America, Tunnel to Towers, Union Rescue Mission and/or American Red Cross.

#Cocktail #HappyHour #MargaritaMocktail #DryJanuary #JalapenoHoneySyrup #FruitJuice #HappyHour2025  #Cheers #Recipes2025 #URM #T2T #FeedingAmerica #RedCross #SamaritansPurse #PerspectivesTheConsultingGroup  
 
                                                                          ©PERSPECTIVES/The Consulting Group, LLC, 2025

0 Comments

Cooking Lesson #981: Magic Cake (Gâteau Magique)

1/15/2025

0 Comments


…from the Perspectives’ Kitchen

How you doin’? Justin Willman is one of my favorite magicians.  He has a Netflix series that defies logic.  I had an opportunity earlier this year to see his show at the Venetian Hotel in Las Vegas and it was a blast. I was actually a participant in the show as he turned my $100 bill into a worthless phony single dollar bill.
 
If you love magic as much as I do, then this magical dessert is for you. It is actually a classic French dessert that separates into three delicious layers.
 
I found out a long time ago that there’s no separating baking from magic. Or maybe there’s no separating baking from science. I love to learn the hows and whys behind kitchen magic, but even with that knowledge, when a soupy batter turns into a cake with three distinct layers, it just feels like magic.
 
My Magic Cake transforms one gooey batter into a 3-in-1 layered dessert with a thick and fudgy bottom layer, a creamy custard center, and a fluffy layer of sponge cake on top. The magic all happens in the oven—no special ingredients or equipment required.  The recipe calls for only a short list of pantry staples, plus it’s easy to customize with different flavors.
 
Magic cake is nothing new. It originates from Southwestern France where it is known as gâteau magique. With a thin batter similar to that of crepes or clafoutis, its origins are not that surprising.
 
In fact, it struck me that if you dappled the batter with some cherries or fresh berries before baking, it’d be deliciously similar to a clafoutis, a staple of the Southwestern region of Limousin.
 
The low oven temperature delays when the cake’s magic structure takes place. As the batter slowly warms in the oven, the starch sinks to the bottom, and air bubbles from the egg whites rise to the top. This results in a dense layer on the bottom, a custardy center, and an airy cake on top.
 
Prep time:  20 minutes
Cook time:  50 minutes
Chill time:  90 minutes
Yield: One 8 x 8-inch cake / 9 servings
 
Ingredients 
2 cups whole milk
1/2 cup unsalted butter, diced into tablespoon-sized pieces
4 large eggs, separated
2/3 cup granulated sugar
2 teaspoons vanilla extract
1/4 teaspoon kosher salt
1/8 teaspoon ground nutmeg
3/4 cup all-purpose flour
Powdered sugar, for dusting
 
Directions
  1. Preheat an oven to 325⁰ F.
  2. Prepare an 8-inch square pan with butter or spray.
  3. Line the pan with a layer of parchment paper covering the bottom and up 2 sides with a slight overhang.
  4. Lightly grease the parchment paper.
  5. In a small saucepan, heat the milk and butter on low heat until the butter melts. Don’t let the milk come to a boil or simmer. It should be warm but not scalding hot, 105⁰ to 115⁰ F. Set aside.
  6. In a large bowl and using a hand mixer, beat the egg whites on medium-high speed until they form stiff peaks, about 4 to 5 minutes. When you lift the beaters out of the bowl, the whipped egg whites should stand up at a point and hold that point.
  7. In another large bowl, beat the egg yolks, sugar, vanilla extract, salt and nutmeg on high speed until the mixture is pale and creamy, about 2 minutes.
  8. Add the flour to the egg yolk mixture and beat on low speed until combined. It may seem like there is too much flour, but the batter will soon be thinned out.
  9. Continue mixing on low speed, or switch to a whisk, and pour in the warm milk and butter one ounce at a time. Once you've incorporated about half of the milk mixture, you can pour in the rest and whisk to combine. The batter will be thin and smooth, like crepe batter.
  10. Add the beaten egg whites, using the whisk to gently mix until there are no large lumps of egg whites. Don’t overmix—there should still be a layer of foam on top of the batter.
  11. Carefully pour the batter into the prepared pan.
  12. Bake until the top is golden brown, the cake has begun to pull away from the sides of the pan, and the center has a slight jiggle when the pan is gently shaken, about 50 minutes.
  13. Remove the pan from the oven and set it on a wire rack until it’s cool enough to go in the refrigerator, about 30 minutes.
  14. Let the cake chill in the fridge for at least 1 hour before serving. You can skip chilling step and serve the cake at room temperature, though it won’t slice as neatly.
  15. Dust the top of the cake with powdered sugar, then slice it into squares.
  16. If desired, serve with fresh fruit and, for extra indulgence, a dollop of whipped cream.
  17. Store leftover magic cake, well-covered, in the refrigerator for up to 3 days. Magic cake does not freeze well. The freezing and thawing process will affect the texture of the custard layer.

ChefSecret:  Magic cake is slightly more forgiving than you might imagine, but here are some secrets for attaining perfectly defined layers.
  • The order of operations is important for achieving the distinct layers in this cake. If any yolk gets into the egg whites, they won't whip properly. Whip the egg whites first so you don't have to wash the beaters in between steps. The egg whites are added to the batter at the end, so they don't deflate and prevent the sponge cake layer from forming.
  • Add the milk and butter slowly to avoid lumps. Start by adding a splash at a time, mixing it in completely before adding the next splash. Once you get through about half of the milk mixture, you’ll know it's safe to add the rest all at once without the batter clumping.
  • Don’t over-mix when adding the egg whites. There should still be a layer of foam floating on the top of the batter, which will bake into the spongy top layer of the cake.

The mix of textures already makes this cake interesting. But with a simple vanilla base, it’s easy to change the flavors. Here are some of my favorite flavor variations for magic cake:

  • Chocolate: Whisk 1/3 cup of cocoa powder into the warm milk and butter until dissolved and no lumps remain. Reduce the flour to 1/2 cup. For a more complex chocolate flavor, add 1 teaspoon of instant espresso powder.
  • Nutella: Mix 1/3 cup Nutella into the egg yolk mixture before adding the flour.
  • Zest: Stir in the zest from 1 lemon or 1 orange.
  • Coffee: Dissolve some instant espresso powder in the warm milk and butter mixture. Use 2 to 3 teaspoons, depending on how strong you’d like the coffee flavor.

You can skip the chilling step and serve the cake at room temperature, though it won’t slice as neatly.


Quip of the Day:  Magic is believing in yourself, if you can do that, you can make anything, including this dessert, happen.
-------------------------------------------
Do you have a question or comment? Send your thoughts to [email protected]. All recipes and cooking tips are posted on our website https://www.perspectives-la.com/covid-19-survival-guide. We have added a new search feature to make it easier to navigate through our blogs.
-------------------------------------------
To you and everyone dear to you, be strong, positive, stay well, stay safe and be kind. Take a breath and count your blessings, and if you have a little extra to share with others, please consider donating to  Feeding America, Tunnel to Towers, Union Rescue Mission and/or American Red Cross.
 
#Dessert #Cake #Baking #GateauMagique #MagicCake #JustinWillman #Recipes2025 #URM #T2T #FeedingAmerica #RedCross #SamaritansPurse #PerspectivesTheConsultingGroup 
 
                                                                      ©PERSPECTIVES/The Consulting Group, LLC, 2025
0 Comments
<<Previous
Forward>>
    Picture

    For over 4 decades collaboration and vision have been the cornerstones of our approach to developing innovative solutions. We fuel innovation, uncover opportunities, discover trends and embrace sustainability, turning imaginative ideas into profitable realities.

    We are expert in the following areas: Strategic Planning, Concept and Brand Development, Market Research, Operations Systems Planning, Operations Programming, Menu Planning & Inventory Optimization, Product Development, Training Programs, HACCP / Sanitation / Food Safety, Co-Packer Evaluation & Coordination, Food Processing & Facility Plant Design.

    Categories

    All
    Air Fryer
    Appetizers
    Baking
    Beef
    B'Fast/Brunch
    Chicken
    Cocktails
    Condiments
    Confections
    Dessert
    Dinner
    Entrees
    Gluten Free
    Gluten-Free
    Happy Hour
    Health & Beauty
    Healthy Recipes
    Holiday Recipes
    Instant Pot
    Instant-pot
    Keto
    Kids
    Lunch
    Lunch/Brunch
    Pets
    Pork
    Poultry
    Poulty
    Salads
    Sauces
    Seafood
    Sides
    Snacks
    Soups
    Sous Vide
    Special Edition
    Turkey
    Veal
    Vegetarian

    RSS Feed

    Archives

    February 2025
    January 2025
    December 2024
    November 2024
    October 2024
    September 2024
    August 2024
    July 2024
    June 2024
    May 2024
    April 2024
    March 2024
    February 2024
    January 2024
    December 2023
    November 2023
    October 2023
    September 2023
    August 2023
    July 2023
    June 2023
    May 2023
    April 2023
    March 2023
    February 2023
    January 2023
    December 2022
    November 2022
    October 2022
    September 2022
    August 2022
    July 2022
    June 2022
    May 2022
    April 2022
    March 2022
    February 2022
    January 2022
    December 2021
    November 2021
    October 2021
    September 2021
    August 2021
    July 2021
    June 2021
    May 2021
    April 2021
    March 2021
    February 2021
    January 2021
    December 2020
    November 2020
    October 2020
    September 2020
    August 2020
    July 2020
    June 2020
    May 2020
    April 2020

www.perspectives-la.com
Copyright © 2021 Perspectives/The Consulting Group, LLC  | Henderson, NV 89052 |   310-477-8877
  • Home
    • Who We Serve
    • How We Work
    • Services >
      • Concept Development
      • Strategic Planning
      • Brand Development
      • Operations
      • HACCP / Food Safety
      • Menu / Product Development
      • Marketing / Research
      • Design
      • Market Planning / Site Analysis
  • Why Perspectives?
    • About Us
    • Principals
    • Mission Statement
    • Code of Ethics
  • Clients
    • Testimonials
    • Client List
  • Contact Us
    • Phone, Address & Contact
  • Covid-19 Survival Guide
  • Perspectives On Food